
If your ice maker is more like a block of ice than a source of refreshing cubes, you’re not alone. Many people face this issue, especially if they use their ice maker frequently or live in a humid area. Fortunately, defrosting your ice maker is a straightforward task that can save you from costly repairs or replacements. In this article, we’ll walk you through some quick tips on how to defrost an ice maker like a pro, ensuring you can keep the ice flowing smoothly.
Key Takeaways
- Check for frost buildup regularly to prevent issues.
- Use warm water or a hair dryer for effective defrosting.
- Employ hot towels for stubborn ice blockages.
- Keep the ice maker clean to avoid future jams.
- Turn off the ice maker when not in use to minimize frost formation.
Table of Contents
Identifying Common Ice Maker Issues
Before we grab our tools and jump into defrosting, let’s figure out what’s actually going on with your ice maker. Is it just a bit frosty, or is there something more serious happening? Knowing the problem helps us choose the right solution and avoid making things worse. We’ve all been there, right? Thinking we can fix something, only to end up with a bigger mess. So, let’s take a look at some common ice maker issues.
Recognizing Frost Buildup
Frost buildup is probably the most common issue we see. It starts small, but if left unchecked, it can turn into a solid block of ice that stops your ice maker from working. The key is to catch it early. A little frost is normal, but excessive buildup? That’s a red flag.
We need to figure out why it’s happening. Is the door sealing properly? Is the freezer temperature too high? These are the questions we need to ask. Regularly inspecting for frost can save us a lot of trouble down the road.
Think of it as a quick check-up for your ice maker. If you notice frost, wipe it away before it becomes a bigger problem. This simple step can prevent major ice blockages and keep your ice maker running smoothly. Don’t underestimate the power of a quick wipe-down!
Understanding Ice Blockages
Okay, so you’ve got more than just a little frost. You’ve got a full-blown ice blockage. This usually happens when frost builds up and melts slightly, then refreezes into a solid mass. It can block the ice dispenser, the ice maker arm, or even the water line.
We’ve seen it all! The first thing we need to do is figure out where the blockage is. Can you see it? Can you reach it? Sometimes, it’s as simple as breaking up the ice with a tool (carefully, of course!). Other times, we need to melt the ice to clear the blockage. Either way, we need to get that ice out of there so the ice maker can do its job.

Warning: Ignoring an ice blockage can put extra strain on the ice maker motor, which can lead to bigger problems down the road. So, let’s get that ice cleared out!
Diagnosing Mechanical Failures
Sometimes, the problem isn’t ice at all. Sometimes, it’s a mechanical failure. This is where things get a little more complicated. Is the ice maker making strange noises? Is it not making any ice at all, even though there’s no ice blockage?
These could be signs of a mechanical issue. It could be a problem with the water valve, the motor, or even the control board. Diagnosing these issues can be tricky, and it might require some technical know-how. If we’re not comfortable troubleshooting these problems ourselves, it might be time to call in a professional.
We don’t want to risk making things worse by poking around where we don’t belong. Remember, safety comes first! And sometimes, the best thing we can do is admit that we need help.
Mechanical failures can be frustrating, but they’re often fixable. The key is to identify the problem early and take appropriate action. Whether that means trying a simple repair ourselves or calling in a professional, addressing the issue promptly can prevent further damage and keep our ice maker running for years to come.
Essential Tools for defrost icemaker
Before we start, let’s ensure we have everything we need. The right tools will make the defrosting process smoother and safer. Trust us; being prepared is half the battle!
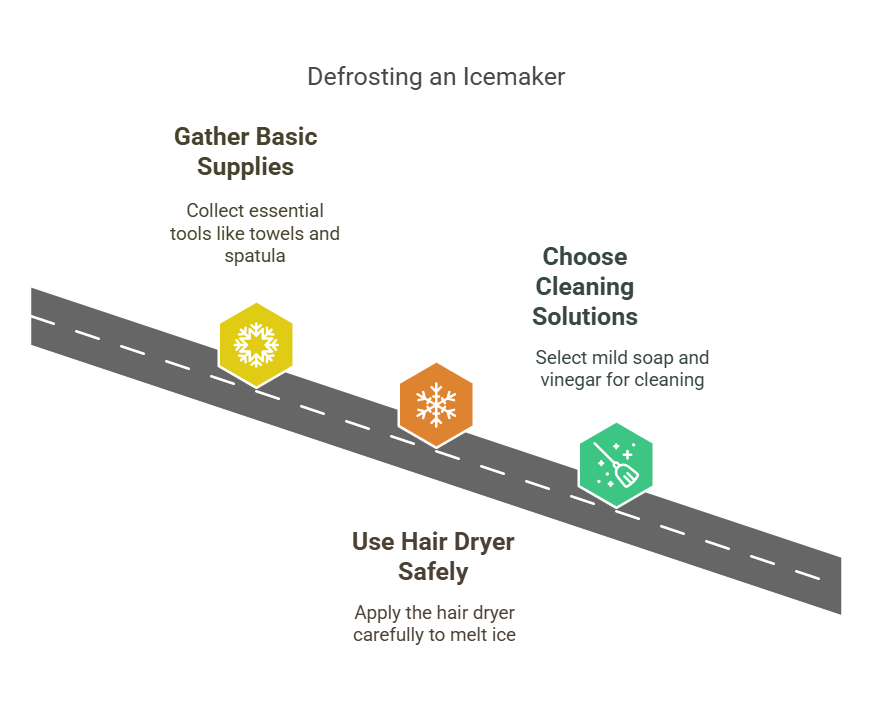
Gathering Basic Supplies
First things first, let’s gather the essentials. We’ll need:
- A clean towel or two For wiping up any excess water. Spills happen, it’s okay!
- A plastic spatula: To gently help dislodge any stubborn ice. Avoid metal, as it can damage the ice maker.
- A bowl or container: To catch melting ice and water. We don’t want a flood on our hands.
- Warm water: In a spray bottle or a pitcher. This is our main weapon against the ice.
Having these items ready will save us time and prevent any frantic searches mid-defrost. Trust me, you don’t want to be running around looking for a towel when water is dripping everywhere.
Using a Hair Dryer Safely
A hairdryer can be a great tool for speeding up defrosting, but safety is key. Never use a hair dryer near water, and always keep it moving to avoid overheating any one spot. We want to melt the ice, not melt the ice maker! Also, ensure the hair dryer is low to prevent damage.
Choosing the Right Cleaning Solutions
Once the ice is gone, it’s a good idea to give the ice maker a quick clean. We recommend:
- A mild dish soap: For general cleaning.
- White vinegar: To help remove any mineral buildup. It’s a natural and effective cleaner.
- A soft cloth or sponge: To gently wipe down the components. No harsh scrubbing is needed!
We should avoid using harsh chemicals or abrasive cleaners, as they can damage the ice maker and contaminate our ice. Let’s keep it clean and safe!
Step-by-Step Defrosting Process
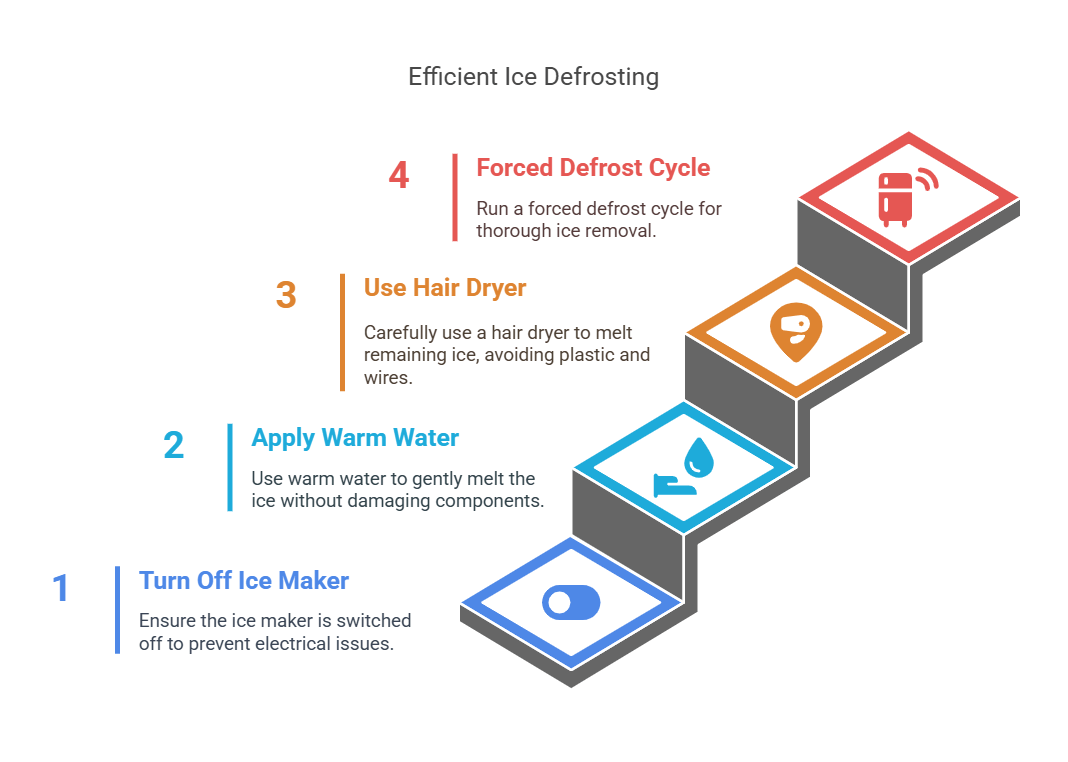
Turning Off the Ice Maker
First things first, safety is key! Before defrosting, we must ensure the ice maker is completely turned off. This usually means switching it off via a control panel setting, or sometimes, it requires unplugging the entire refrigerator. Refer to your refrigerator’s manual to be absolutely sure. This prevents electrical mishaps and ensures the ice maker’s components aren’t running while we try to thaw things out. For a manual defrost, you’ll want to unplug the refrigerator for safety.
Applying Warm Water Techniques
Okay, now for the fun part – melting that ice! We’ve found that warm water is our best friend here. Don’t use boiling water, though; that could damage the plastic components. Instead, fill a container with warm water and gently pour the water over the ice buildup with a turkey baster or a small cup.
Focus on areas where you see the most ice, like around the ejector arm or the ice mould. Repeat this process several times, and you’ll see the ice loosen up. Be patient; it might take a few tries. Make sure you have a towel handy to soak up any excess water to prevent it from refreezing.
Using a Hair Dryer Effectively
If warm water isn’t cutting it, a hair dryer can be a great alternative. But, and this is a big but, we need to be super careful. Keep the hair dryer moving, and don’t hold it too close to any one spot.
The goal is to gently warm the ice, not melt the plastic. We usually start with the lowest heat setting and gradually increase it if needed. Pay close attention to any areas where wires or electrical components are visible, and avoid getting them wet. Remember, safety first! We’ve found that using a hair dryer in short bursts, followed by wiping away the melted ice, is the most effective approach.
If you’ve run several forced defrost cycles, but it doesn’t look like the ice is melting, remove the food from your fridge and run a forced fridge defrost—select “RD” on the interface or unplug your refrigerator. This defrosts both the fridge and the freezer compartments.
We always make sure to have plenty of towels on hand to catch any drips and prevent water from getting into places it shouldn’t. It’s also a good idea to have a bucket nearby to dump the melted ice and water. This makes the whole process much cleaner and less messy.
Here’s a quick recap of the steps:
- Turn off the ice maker.
- Apply warm water to the ice buildup.
- Use a hair dryer on a low setting if needed.
- Wipe away any melted ice and water.
- Repeat until the ice maker is completely defrosted.
Quick Thawing Methods for Stubborn Ice
Sometimes, you’ll find that the usual methods just don’t cut it. When faced with a particularly stubborn ice blockage, it’s time to bring out the big guns. We’ve all been there, staring into the ice maker, wondering if we’ll ever have ice again. Don’t worry; we’ve got some tricks to help you out.
Employing Hot Towels
One simple yet effective method is using hot towels. Wet a towel with hot water (not scalding, just nice and warm), then drape it over the icy areas. The heat from the towel will help to melt the ice gradually.
You might need to repeat this a few times, re-wetting the towel as it cools. It’s a gentle approach that minimizes the risk of damage. Think of it like giving your ice maker a warm, comforting hug.
Utilizing Ice Picks Carefully
If you feel more hands-on, an ice pick can be your friend. But, and this is a big but, you need to be extremely careful. Never force anything. Gently chip away at the ice, working slowly and deliberately.
Warning: Avoid directly hitting any of the ice maker’s components, as you could easily damage them.
It’s all about finesse, not brute strength. Think of yourself as an ice sculptor, carefully shaping your way to freedom. Consider the Water Line Buddy Deluxe if you want a tool to help.
Implementing Warm Water Pouring
Sometimes, a direct approach is best. Carefully pouring warm water over the ice blockage can work wonders. Use a container with a spout for better control, and aim the water directly at the ice.
Warning: Avoid boiling water; the sudden temperature change could damage the plastic components
It’s like giving your ice maker a warm shower, washing away all those icy troubles.
Remember, patience is key. Don’t rush the process, and don’t force anything. With a little persistence and the right techniques, you’ll have your ice maker back up and running in no time. And who knows, you might even find the whole process a little bit satisfying. After all, there’s nothing quite like the feeling of conquering a stubborn ice blockage.
Here’s a quick recap of the methods:
- Hot Towels: Gentle and gradual melting.
- Ice Picks: Careful chipping for targeted removal.
- Warm Water Pouring: Direct melting action.
Preventative Measures to Avoid Future Freezing
After going through the trouble of defrosting your ice maker, it’s a good idea to put some effort into preventing future freezing. A little maintenance can save you a lot of hassle down the road. Here’s what we recommend:
Regularly Inspecting for Frost
Make it a habit to check your ice maker for frost buildup regularly. We usually take a peek every couple of weeks. Catching frost early makes it easier to deal with. If you see any, wipe it away with a dry cloth before it worsens. This simple step can prevent major ice blockages.
Cleaning Ice Maker Components
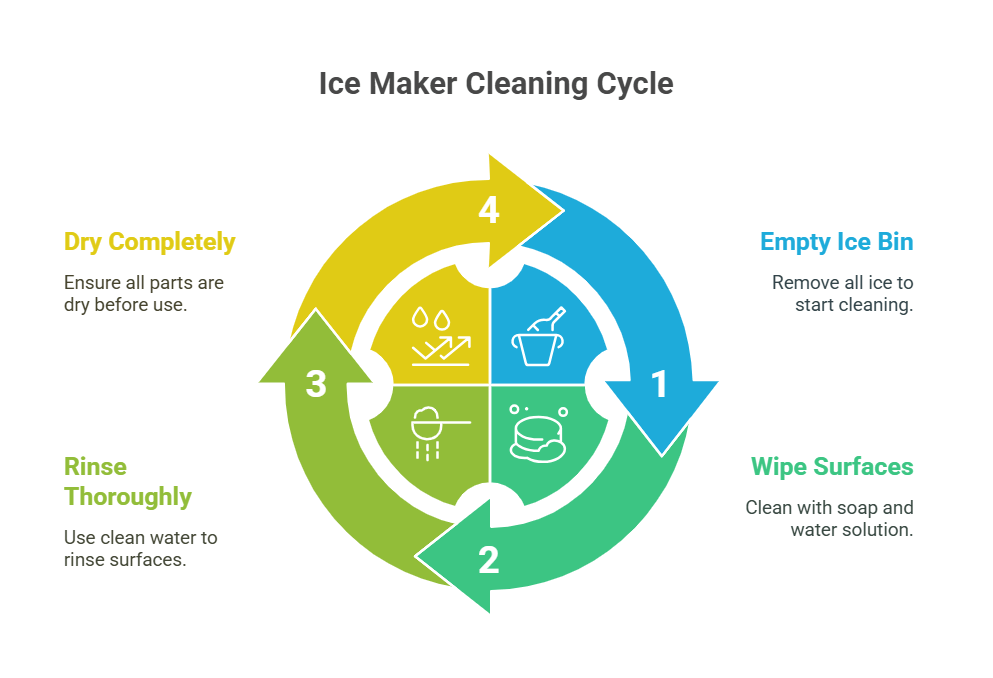
Cleaning the components is also important. Over time, mineral deposits and other gunk can accumulate, affecting performance and contributing to freezing. We recommend cleaning the ice maker at least twice a year. Here’s a quick rundown:
- Empty the ice bin.
- Wipe down all interior surfaces with a solution of mild soap and water.
- Rinse thoroughly with clean water.
- Dry everything completely before turning the ice maker back on.
Disabling When Not in Use
If you’re going to be away for an extended period, or if you don’t use your ice maker often, consider disabling it. This prevents it from constantly running and potentially freezing up. It’s a simple step that can save energy and prevent problems. We usually turn ours off when we go on vacation. It’s also a good idea to secure electrical connections before you leave.
Taking these preventative steps can significantly reduce the chances of your ice maker freezing up again. It’s all about being proactive and consistent with maintenance. A little effort now can save you from a lot of headaches later.
The Defrost Cycle
How the Defrost Cycle Works
Okay, so let’s talk about how the defrost cycle actually works. Basically, your ice maker is designed to prevent excessive frost buildup. Most ice makers have a built-in system that periodically melts any accumulated frost. This usually involves a small heater that warms the ice maker components, causing the frost to melt and drain away. The timing of these cycles is usually automatic, controlled by a timer or sensor that detects frost levels. If you’re curious about the specifics of your model, check your user manual – it should have the details.
When to Initiate a Defrost Cycle
Knowing when to kick off a defrost cycle manually is key. Usually, you don’t need to do anything – the ice maker handles it. However, if you notice your ice production slowing down or the ice cubes are smaller than usual, it might be time to intervene.
Also, if you see visible frost buildup inside the ice maker, that’s a pretty clear sign. Don’t wait until the whole thing is a solid block of ice!
Signs That Defrosting is Needed
Here are some telltale signs that your ice maker is begging for a defrost:
- Reduced ice production.
- Smaller or misshapen ice cubes.
- Visible frost or ice buildup inside the ice maker compartment.
- Unusual noises coming from the ice maker.
- The ice maker is completely frozen over.
Ignoring these signs can lead to bigger problems down the road, like a completely frozen ice maker that requires more drastic measures to fix. Plus, a frosty ice maker isn’t very efficient, so you’re wasting energy too. It’s better to address the issue early on.
If you’ve run several forced defrost cycles, but it doesn’t look like the ice is melting, remove the food from your fridge and run a forced defrost—select “RD” on the interface or unplug your refrigerator. This defrosts both the fridge and the freezer compartments.
Cleaning and Maintenance Tips
We all know that a clean ice maker is a happy ice maker! And a happy ice maker means better-tasting ice and fewer problems down the road. Let’s discuss how we can keep our ice makers in tip-top shape.
Using Ice Maker Cleaners
Okay, so first things first: ice maker cleaner. It’s not just a fancy name; it’s specifically designed to break down mineral buildup and grime that can accumulate inside your ice maker. We usually dilute the cleaner according to the instructions on the bottle, usually by mixing it with water.
Then, we run a cleaning cycle (if your ice maker has one) or let the solution sit before thoroughly rinsing. It’s kind of like giving your ice maker a spa day. This is a great way to ensure you are performing regular ice maker maintenance.
Wiping Down Components
Beyond the occasional deep clean, we try to make it a habit to wipe down the ice maker’s interior components regularly. This includes the ice bin, the dispensing area, and any other surfaces we can reach. A simple solution of mild soap and water works wonders. Just make sure everything is completely dry before we put it back together. Nobody wants mouldy ice!
Checking Rubber Seals
Rubber seals are those unsung heroes that keep our ice makers running efficiently. They create a tight barrier, preventing warm and cold air from escaping. Over time, these seals can become cracked, brittle, or just plain dirty. We give them a good once-over every few months, cleaning them with a damp cloth and ensuring they’re still pliable.
If we notice any damage, we replace them ASAP. It’s a small investment that can save us a lot of headaches in the long run.
Keeping your ice maker clean isn’t just about aesthetics; it’s about ensuring the quality of your ice and extending the lifespan of your appliance. A little bit of regular maintenance can go a long way in preventing costly repairs and keeping your ice maker churning out those perfectly formed cubes for years to come.
Troubleshooting After Defrosting
Okay, so you’ve gone through the whole defrosting process. Now what? Sometimes, even after all that work, things still aren’t quite right. Let’s walk through some common issues and how to tackle them.
Testing Ice Production
First, let’s see if the ice maker is making ice! Give it about 24 hours after defrosting to see if it starts producing. A normal ice maker should produce a batch of ice every few hours.
If it’s been a day and you still don’t see any ice, something’s up. Check the water line to ensure it’s properly connected and that there are no kinks restricting water flow. Sometimes, the most straightforward solutions are the ones we overlook.
Also, ensure the water filter isn’t clogged; a dirty filter can severely impact ice production.
Identifying Remaining Issues
So, no ice? Or maybe the ice is weirdly shaped or too small? Here are a few things to consider:
- Check the Ice Maker Arm: Ensure it’s in the ‘down’ position. If it’s up, the ice maker won’t start.
- Listen for the Water Valve: When the ice maker cycles, you should hear a faint hum as the water valve opens to refill the tray. No sound? That valve might be faulty.
- Inspect for Leaks: Look around the ice maker and the surrounding area for any signs of water leakage. Leaks can indicate a problem with the water line or the ice maker.
If you notice any unusual noises, like loud grinding or clicking, it could indicate a mechanical problem within the ice maker unit. Don’t ignore these sounds; they’re often a sign of something more serious.
When to Call a Professional
If you’ve tried the basic troubleshooting steps and your ice maker is still on the fritz, it might be time to call in the pros. Persistent problems like a continuously freezing ice maker, strange noises you can’t identify, or electrical issues are best left to qualified technicians.
Trying to fix complex issues yourself could lead to further damage or even injury. Plus, a professional can accurately diagnose the problem and offer the best solution, saving you time and potential headaches in the long run. Don’t hesitate to involve a qualified technician if you’re feeling out of your depth.
Safety Precautions During Defrosting
Defrosting your ice maker might seem straightforward, but it’s important to prioritize safety. We want to avoid any accidents or damage during the process. Let’s go over some key precautions to keep in mind.
Avoiding Electrical Hazards
Water and electricity don’t mix! Always disconnect the ice maker from its power source before you start defrosting. This is the most important step to prevent electric shock. Make sure your hands are dry when unplugging the unit.
Also, be careful not to splash water near any electrical outlets or connections. If you’re using a hair dryer, keep it a safe distance from water to avoid any potential hazards. If you’re unsure about the electrical setup, it’s always best to consult a professional. Remember to consult the repair manual before starting.
Handling Tools with Care
When we’re using tools like ice picks or even just a spatula to remove ice, we need to be extra careful. Here are some tips:
- Avoid using sharp metal objects that could damage the ice maker’s components.
- Never apply excessive force. Gentle pressure is usually enough to dislodge the ice.
- Wear gloves to protect your hands from the cold and any sharp edges.
Protecting Surrounding Areas
Defrosting can get messy, so let’s protect the area around the ice maker. Here’s how:
- Place towels or absorbent mats underneath and around the ice maker to catch any melting water.
- Be mindful of nearby surfaces that could be damaged by water, such as wooden floors or cabinets.
- Have a bucket or container ready to collect large chunks of ice as they come loose. This will help prevent water from spreading and causing a slip hazard. Remember, a little preparation can save us from a lot of cleanup later. If you’ve run several forced defrost cycles and the ice isn’t melting, consider a fridge defrost.
Long-Term Care for Your Ice Maker
Taking care of your ice maker isn’t just about defrosting when things go wrong. It’s about setting up habits that keep it running smoothly for years. We’ve found that a little preventative work goes a long way in avoiding major headaches down the road. Let’s dive into how we can keep our ice makers in top shape.
Scheduling Regular Maintenance
Think of your ice maker like your car – it needs regular check-ups! We aim to schedule a deep clean and inspection at least twice a year. This involves more than just a quick wipe-down. We’re talking about really getting in there, checking for mineral buildup, and making sure all the connections are solid.
It’s also a good time to replace the water filter, which can significantly impact the ice quality and the overall health of the machine. Here’s a simple schedule we try to stick to:
- Spring Cleaning: A thorough cleaning after the winter months.
- Fall Prep: Getting the ice maker ready for increased use during the holidays.
- Filter Replacement: Every six months, without fail.
Keeping the Ice Maker Dry
Moisture is the enemy! Excess water can lead to mold, mildew, and, of course, ice buildup. After defrosting or cleaning, we always make sure to dry all the components thoroughly. We use a clean, dry cloth to wipe down the interior, paying special attention to the ice bin and any crevices where water might hide.
We also leave the ice maker door open for a short period to allow air to circulate and dry everything out completely. This simple step can prevent a lot of problems.
Monitoring Humidity Levels
Humidity plays a bigger role than we often realize. High humidity can cause frost to form more quickly, leading to frequent defrosting needs. We try to keep the humidity around our ice maker in check. If we live in a particularly humid area, we might consider using a dehumidifier nearby.
Also, ensuring proper ventilation around the appliance can help reduce moisture buildup. It’s a small thing, but it makes a difference. If you notice ice buildup frequently, it might be time to check your humidity levels.
We’ve learned that consistent monitoring and proactive measures are key to extending the life of our ice makers. By paying attention to these details, we can avoid costly repairs and enjoy fresh ice for years to come.
Understanding Ice Maker Components
It’s helpful to know what’s going on inside your ice maker. We’re going to break down the main parts and how they affect performance. Knowing this can make troubleshooting much easier.
Identifying Key Parts
Let’s talk about the main players in your ice maker. You’ve got the water inlet valve, which controls the water flow. Then there’s the ice mold, where the ice actually forms. Don’t forget the thermostat, which regulates the temperature, and the ejector arm (or flex tray), which pushes the ice out.
Finally, there’s the ice bin, where the ice hangs out until you need it. These key parts all work together to make ice happen.
How Components Affect Performance
Each part plays a vital role. If the water inlet valve is clogged, you won’t get any ice. A faulty thermostat can cause the ice maker to overfreeze or not freeze at all. A broken ejector arm means the ice won’t come out. Understanding how these parts interact helps you pinpoint problems faster.
Common Issues with Components
Here are some common problems we see:
- Water Inlet Valve: Clogs or failures to open/close properly.
- Thermostat: Malfunctions leading to incorrect temperatures.
- Ejector Arm/Flex Tray: Breakage or motor failure.
- Ice Mold: Cracks or mineral buildup.
It’s important to regularly inspect these components. Small issues can often be fixed before they turn into big, expensive problems. A little maintenance goes a long way.
Here’s a simple table showing common issues and their potential causes:
| Component | Common Issue | Possible Cause |
|---|---|---|
| Water Inlet Valve | No water flow | Clog, valve failure |
| Thermostat | Incorrect temperature | Faulty sensor, wiring issue |
| Ejector Arm | Ice not ejecting | Broken arm, motor failure |
| Ice Mold | Ice sticking, odd shapes | Mineral buildup, cracks |
When to Seek Professional Help
Let’s be real; sometimes DIY just isn’t the answer. We’ve all been there, staring at a problem that’s way beyond our skill level. Ice makers can be tricky, and knowing when to throw in the towel and call a pro can save you a lot of headaches (and money) in the long run.
Recognizing Persistent Problems
Okay, so you’ve tried everything we’ve suggested, and your ice maker is still acting up. Maybe it’s making weird noises, not producing any ice at all, or the ice it is making is misshapen or tastes funny. If you’re dealing with the same issue repeatedly, even after defrosting and cleaning, it’s a sign that something more serious is going on.
Don’t keep banging your head against the wall; it’s time to get a professional opinion. It could be a faulty valve, a broken ice maker component, or an electrical problem – things best left to the experts.
Understanding Repair Costs
Before you pick up the phone, it’s a good idea to have a general sense of what ice maker repairs might cost. Call around to local appliance repair shops and ask for a ballpark estimate for common issues.
This will help you decide whether it’s worth fixing your current ice maker or if you’re better off replacing it altogether. Keep in mind that the cost of parts and labor can vary widely depending on the brand and model of your ice maker.
Getting a few quotes will give you leverage when discussing the repair with a technician. It also helps you avoid getting overcharged. Remember to ask about any diagnostic fees and whether they’ll be waived if you proceed with the repair.
Finding a Qualified Technician
Not all repair people are created equal. You want someone who knows their stuff and has experience working with ice makers specifically. Here’s what we recommend:
- Ask for referrals: Check online reviews and ask friends, family, or neighbors for recommendations.
- Check credentials: Make sure the technician is licensed and insured. This protects you in case something goes wrong during the repair.
- Get a written estimate: Before any work begins, get a detailed estimate that includes the cost of parts, labor, and any other fees.
- Inquire about warranties: Find out if the repair work is guaranteed. A reputable technician will stand behind their work.
Don’t be afraid to ask questions and do your research. Finding the right technician can make all the difference in getting your ice maker back up and running smoothly.
Wrap-Up: Keep Your Ice Maker Running Smoothly
So there you have it! Defrosting your ice maker doesn’t have to be a huge hassle. Just remember to turn it off first, use warm water or a hair dryer, and be gentle with any ice blockages. It’s all about being patient and careful.
And don’t forget, regular maintenance can save you a lot of trouble down the line. Check for frost buildup and clean those seals. With these tips, you’ll keep your ice maker in top shape and ready to serve up ice whenever you need it. Happy ice making!
Frequently Asked Questions
What causes ice buildup in my ice maker?
Ice buildup can happen due to high humidity, a clogged water line, or if the ice maker isn’t cleaned regularly.
How often should I defrost my ice maker?
You should defrost your ice maker at least once a year, or more often if you use it a lot or live in a humid area.
Can I use a hair dryer to defrost my ice maker?
Yes, you can use a hair dryer on a low heat setting to help melt the ice, but keep it a few inches away from the appliance.
What tools do I need to defrost my ice maker?
You will need warm water, towels, and possibly a hair dryer or ice pick to help with the defrosting process.
How can I prevent ice from building up again?
To prevent future ice buildup, regularly check for frost, clean the ice maker, and turn it off when not in use.
What should I do if my ice maker is still not working after defrosting?
If it’s still not working, check for other issues like a clogged water line or mechanical failures, or consider calling a professional.
Is it safe to pour warm water directly into the ice maker?
Yes, pouring warm water can help melt ice, but be careful not to pour too much at once to avoid flooding.
When should I call a technician for my ice maker?
Call a technician if you notice persistent issues or if the ice maker is still not functioning after you’ve tried defrosting it.